This is about painting a pattern on a kayak but there’s a Greenland roll at the end of the video for the kayakers among you, using a Greenland paddle.
I have used many types of paint for pictures and I have painted other vehicles to customise them, which you can read about in my articles, but this is the first to be customised using acrylics. I think we can show that Acrylics appear to be effective for painting a fibreglass boat for decorative purposes but not as a long-term durable finish.
( Short Video is under two minutes )
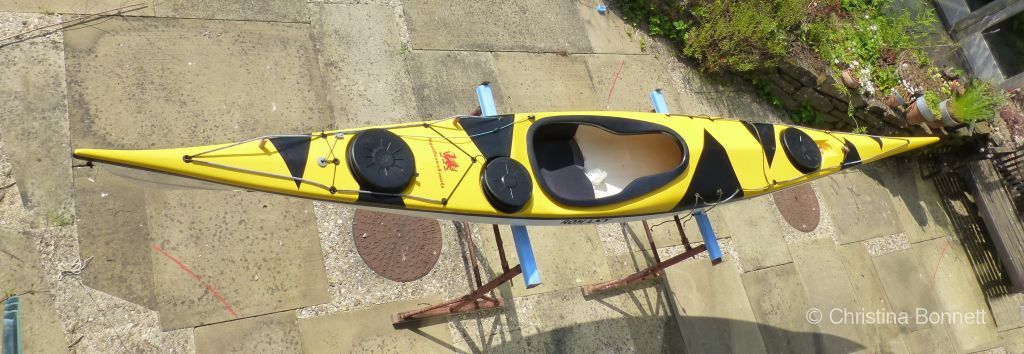
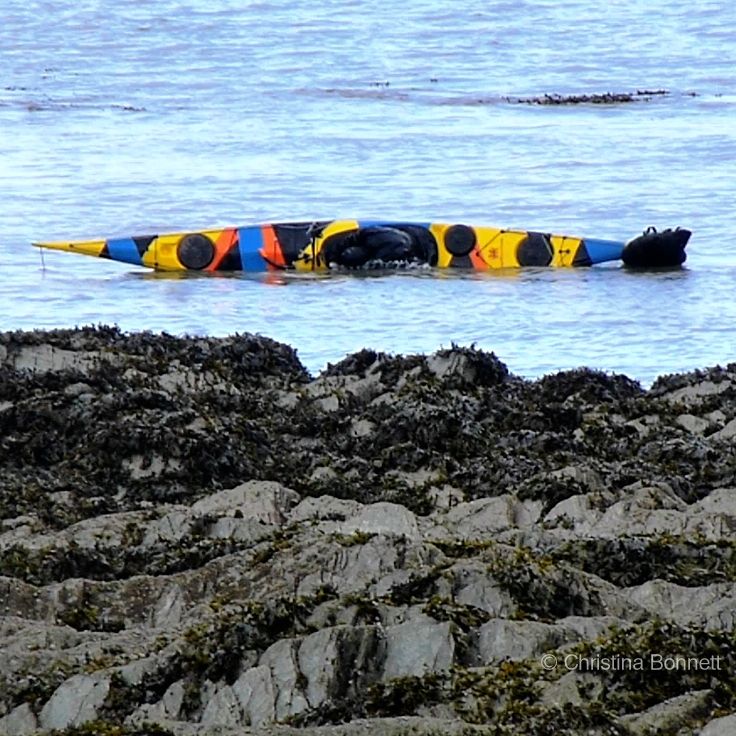
Finished in strong bright yellow, the sea kayak looked just like every other kayak on the water and making it look a bit different seemed like a good idea.
A sketch on the back of an envelope was our guide, simple black triangles on the strong bright yellow would easily distinguish it from others and the the hatch covers would become part of the design.
We discussed various paints that would withstand salt water and stick to the surface and settled on acrylics, with the idea that it would be easy to touch up when it got a few knocks.
With the weather warm and dry we set about masking up the shapes and sanding them with a fine wet and dry paper to give a slight key.
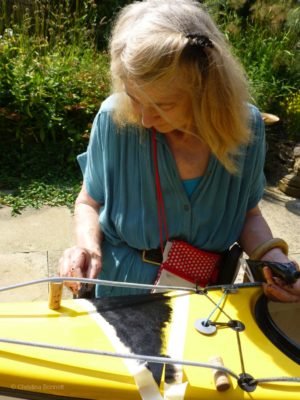
Painting with a sponge
I decided to use pieces of sponge cut to be small and manageable to apply the paint. A brush would drag too much and I wanted to cover in one coat. Using the paint neat, squeezed on to the sponge I dabbed it on rapidly, starting in the middle of each triangle and working outwards towards the edge of the masking tape.
This was to avoid spoiling the edges when the tape was pulled off. Tip. When painting is done, get the tape off as soon as possible, even before it is completely dry. Always keep the tape tight and pull it off parallel to its own line so that you are left with a clean line.
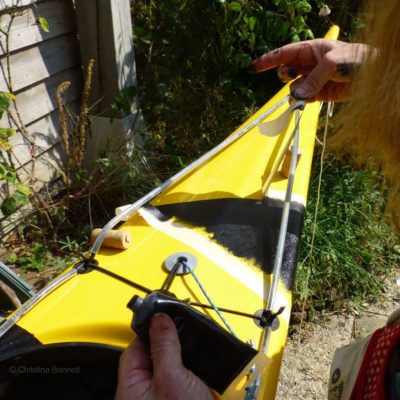
Timing and Ingenuity
We had to work fast. The sun was hot and drying the paint even as I dabbed. The criss-cross ropes had to be held out of the way and off the surface as it dried. Wine corks came to the rescue. It was quite a game, moving the corks to pull the cord this way and that and then leaving them in position just long enough to allow the paint to dry. We only had a few so they had to be re-deployed as we progressed. You might wonder why we didn’t remove the ropes. Of course it would have been easier to paint, but there are a lot of knots!
I suggested the kayak should not be used for a couple of days, to allow the paint to cure. It soon got its first test in the sea and we wondered how it would hold up but the paint was surprisingly tough. The slightly rough finish produced by sponging was pleasing too.
A few weeks passed and then we thought of adding blue to the kayak. The paint had stood up to paddling in the sea and Greenland roll practice, so we were confident about using artist acrylics.
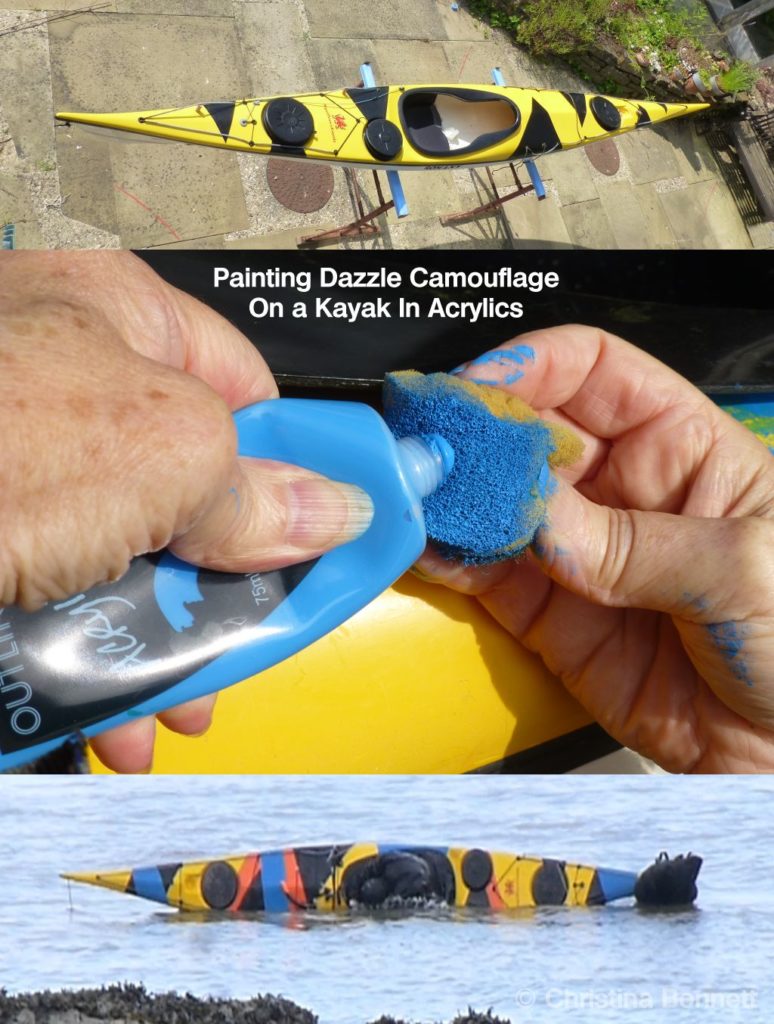
Dazzling Inspiration
By now the disruptive camouflage, known as ‘Dazzle pattern’, that was used on some wartime ships was inspiring further development of the pattern on the kayak. We picked a sunny afternoon. Once again the stands were put up and the kayak wedged into position.
We masked off the edges on the original yellow surface with the usual masking tape but thought it might be too sticky to put on the black. Some of that ‘temporary’ plastic tape did the trick, though it had to be lightly held in place as I went.
There was not as much painting to do as the first time, or so it seemed. The undercut around the [hole where you get in] could not be reached with the sponge and I had to use a brush. I did a bit of dabbing to simulate the sponged surface.
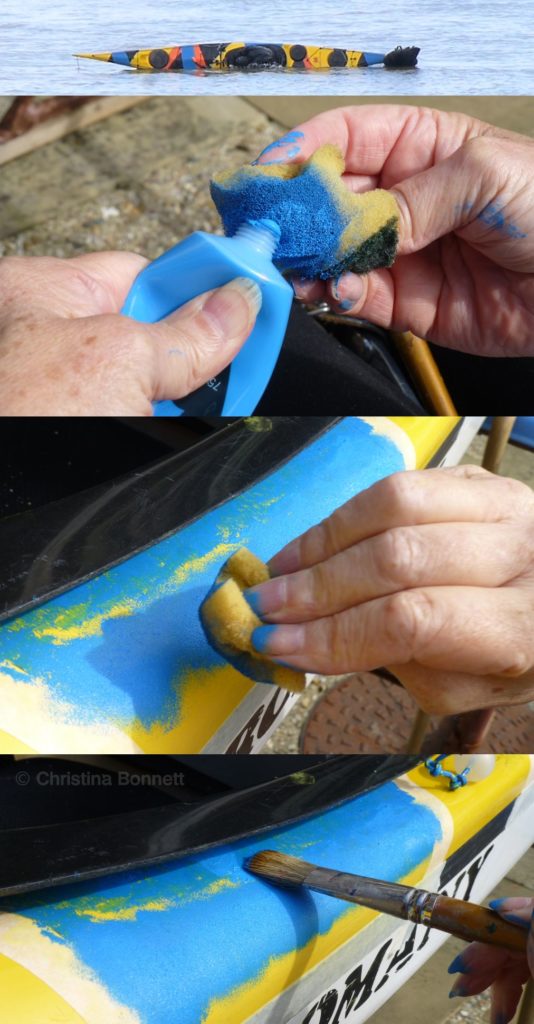
One thing I learned is that kayaks have a multitude of little fittings that get in the way. A small artist watercolour brush was used to paint carefully around them. I was very fussy about washing it out thoroughly every few minutes. I had a big plastic bowl of water handy to throw the brush in.
Acrylics Drying Time in Hot Weather
Painting like this is a race. You can’t hang about and if you stop for a rest, you have to wash everything out, really well. That’s the nature of acrylics. Brushes do dry solid if you leave them.
And so the blue stage was completed – There was talk of adding pink. I wasn’t convinced so a few more weeks went by.
By now the dazzle camouflage seemed the natural way to go with this design. It was used on Some WW2 warships and there was a touch of pink in a picture I had seen.
The pink had to be mixed so I made enough to complete the painting in a small bowl using vermillion and white, but keeping the colour vibrant and strong.
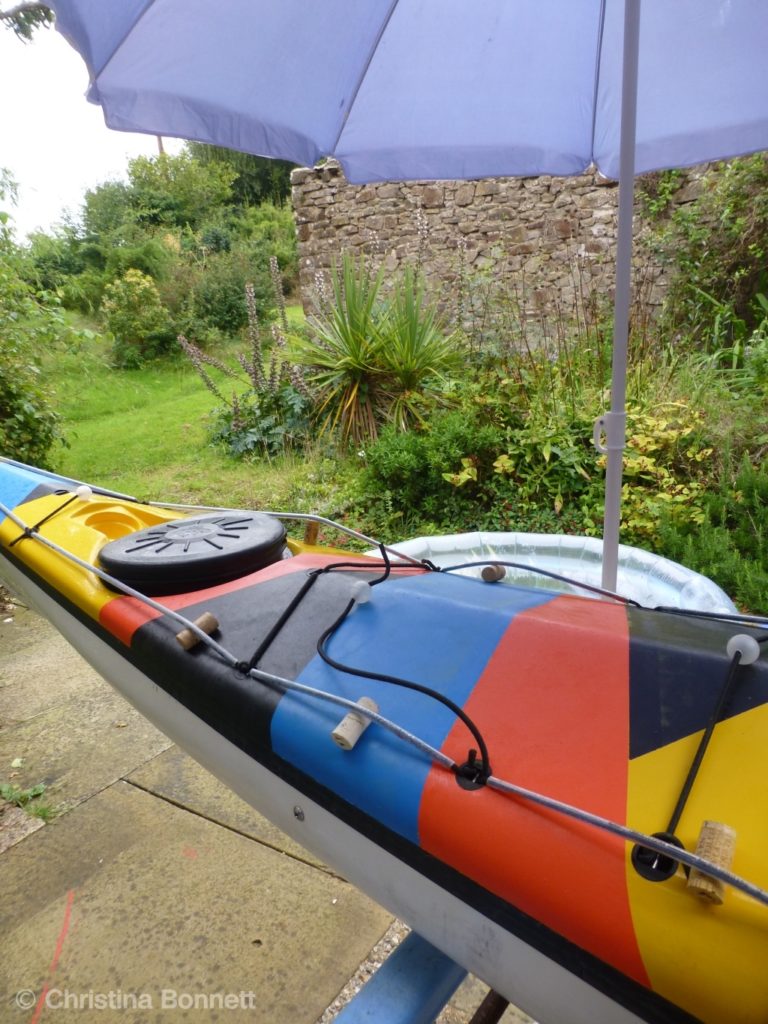
Dazzle colours and brolly to keep rain off while the paint dries
This time it was much less painting and we risked a dull dry morning with possible showers later. Hah! by now the weather was less reliable.
The Pink stage was completed just in time before the showers started. A blue umbrella in a stand was hastily erected while I finished the last stripe, and a tarpolin covered the paint at the stern.
We went indoors for tea.
Greenland Paddling at Lee bay – Lots of Kayak Roll Practice
The kayak went on to do some dazzling Greenland rolls – Not with me! I was the audience.
If you enjoyed reading about our long-winded way of going about Painting Dazzle Camouflage on a Kayak with Acrylics, you can sign up to be notified of my art ramblings with pictures.
Writing things up is quite time-consuming, (I’d rather be painting!) so it won’t be all that often.